![]() Table of Contents
Table of Contents
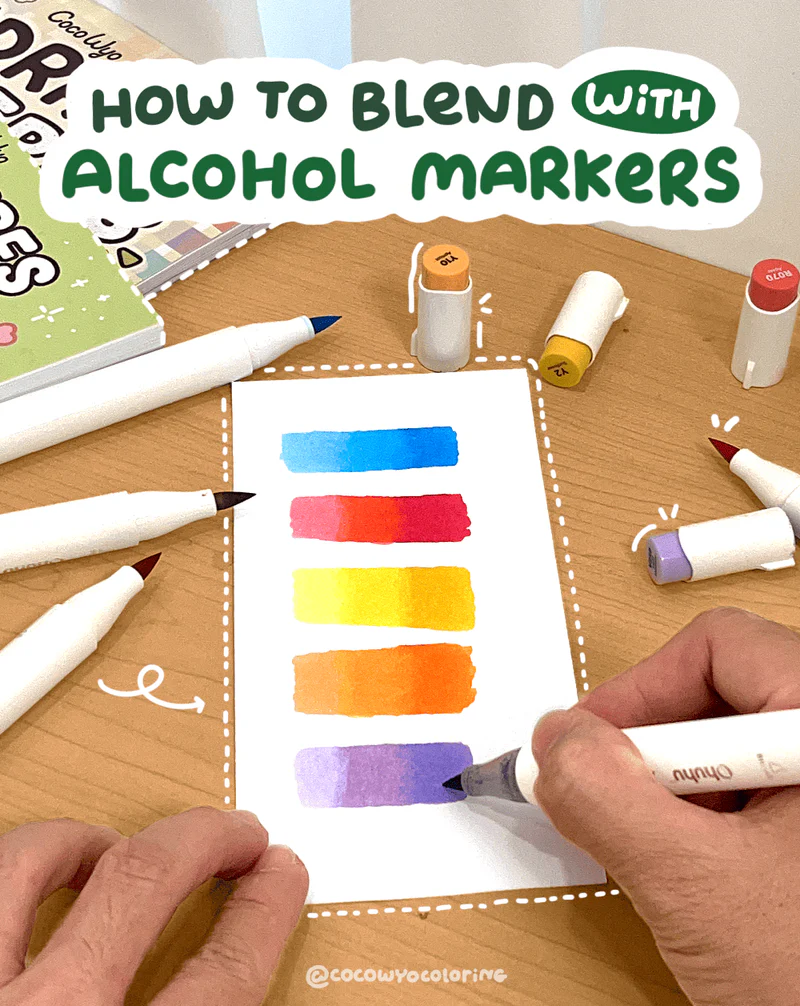
Blending with alcohol markers feels almost magical when it works right and the good news is you don’t need fancy tricks to get there. Once you understand the simple flow of how these markers behave, your colors start melting together in the prettiest way.
Take it slow, enjoy the moment and we’ll build everything up step by step so your blends look smooth and effortless!
Method 1: Light to Dark
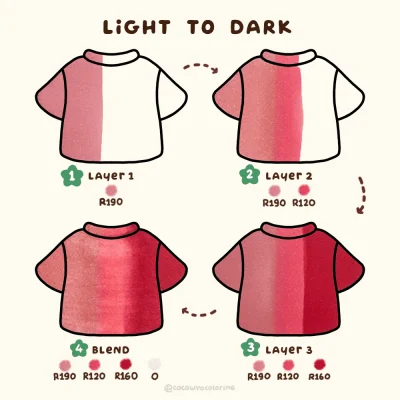
This is the easiest method for beginners and a great example of what alcohol markers are used for, building color gradually while staying in control.
How to do it:
- Start Light: Pick a small area, like a leaf, and color it all with your lightest marker. This lays down wet ink and preps the paper.
- Add Medium: While the light color is still wet, add your medium color where you want shadows, covering about half of the light area.
- Blend the Line: Go back with the light marker and gently color over the line where the light and medium meet. Use small circles or a soft back-and-forth motion.
- Add Dark: Use the darkest color in the smallest area, usually at the base or deepest shadow.
- Blend Again: Blend dark to medium with your medium marker, then blend medium to light with the light marker.
Quick Tips for Success:
- Work in small sections: Alcohol ink dries fast, so color one leaf or small area at a time.
- Don’t press too hard: Let the marker flow naturally. Layer gradually for smooth blends.
- Marker type: Brush or chisel tips work best for blending; experiment to see what feels comfortable.
And that’s it! You’re just layering your colors little by little, keeping it smooth and easy.
Method 2: Dark to Light
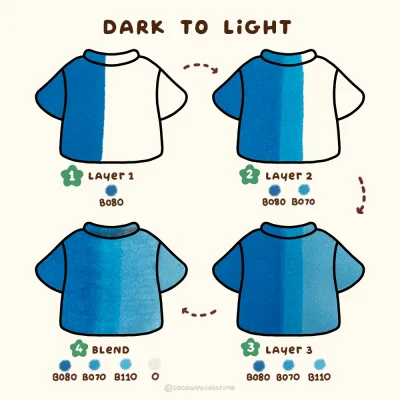
This is the reverse of the light-to-dark method and it’s a great way to practice using an alcohol blender marker to smooth transitions as you go. It’s perfect when you want your darkest shadows strong right from the start.
How to do it:
- Start Dark: Lay down your darkest color in the small area that holds the deepest shadow.
- Add Medium: With the dark ink still wet, use your medium marker. Overlap it slightly at the edge of the dark area, and pull out further.
- Add Light: While the medium is still wet, apply your lightest marker. Start at the edge of the medium ink and drag it out toward the lightest part of the area.
- Re‑Blend (Optional): Go back with your medium marker to soften the dark‑to‑medium line, or use the light marker to smooth the medium‑to‑light transition.
Quick Tips: Layer lightly at first, you can always add more.
Method 3: Feather Blending
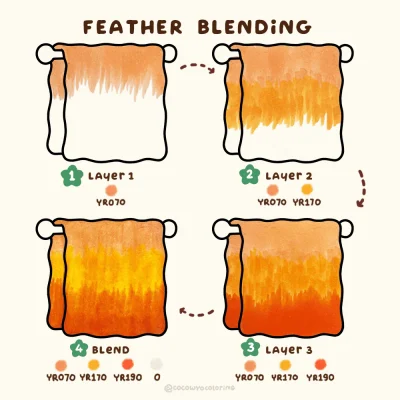
Want your fur, hair, or tiny leaves to look alive? This flicking method does just that.
How to do it:
- Start with darkest color at the base and flick outward with quick wrist motions, lifting the tip at the end.
- Add your medium color, flicking over the dark strokes and extending slightly further.
- Finish with your lightest color, flicking over the medium strokes all the way to the tip.
Quick Tips for Beginners: Keep your flicks short and light at first, longer strokes can be added once you’re comfortable.
Method 4: Stippling Technique
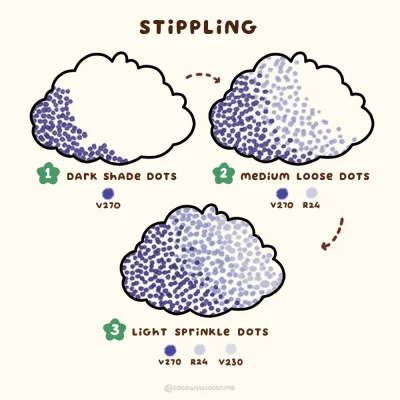
Want something more than a smooth gradient? This method is all about texture, perfect for fuzzy sweaters, starry skies, or leafy bushes.
How to do it:
- Start with the dark shade and dot closer together in the shadow area.
- Switch to the medium shade and dot a little looser around the edges.
- Use the light shade to sprinkle just a few dots in the bright spots.
- Adjust the medium and light dots until the blend feels nice and soft.
Common Blending Mistakes & How to Fix Them
Even experienced artists have moments where blends don’t look right. If you’re just starting, these are the usual slip-ups and how to handle them.
1. Coloring Too Large an Area at Once
- Mistake: Trying to blend a big section all at once
- Why It Happens: Alcohol ink dries fast, so colors don’t merge smoothly
- Fix: Work in small sections, a few inches at a time. Blend while the ink is still wet so the colors flow into each other naturally.
2. Pressing Down Too Hard
- Mistake: Using too much pressure while coloring
- Why It Happens: Pressing harder won’t improve coverage and can damage the nib
- Fix: Use light, even strokes. Let the marker glide across the paper, it spreads better without streaks.
3. Using Dirty or Overworked Nibs
- Mistake: Blending with stained, frayed, or clogged tips
- Why It Happens: Ink buildup or overuse makes blending uneven
- Fix: Scribble on scrap paper to clean the nib, rotate markers, and replace damaged tips. Clean nibs blend smoothly and give better control.
4. Not Swatching Colors First
- Mistake: Assuming the cap matches the ink perfectly
- Why It Happens: Marker caps rarely match the true color
- Fix: Test colors on scrap paper first. Swatching helps you see how shades mix and avoids surprises on your project.
FAQs
Not at all. You only need a place to store the file. Once the PNG is downloaded, it stays on your device and you don’t need to log in again.
You can use them for quiet self-care moments, add them to your journal, print them as simple cards, color them on your iPad, or keep them handy for easy weekend activities with loved ones.
- Make a dedicated folder on your iPad or laptop so everything stays neat.
- Rename each file after you download it, so it’s easy to find later.
- Keep a backup in iCloud or Google Drive in case your device gets full or needs a reset.
- One simple idea: create a folder called “CocoWyo Freebies” to keep all your pages together in one cozy place.
Yes. Most printable sheets import smoothly into digital planners, including free printable Christmas coloring sheets. You can resize them, add stickers, and keep everything organized in your journal app.
Once saved, they’re yours. Our websites rotate their freebies seasonally, but your downloaded file won’t disappear from your device.
We don’t follow a strict schedule, but we usually add new freebies about twice a month. It’s always a good idea to check back now and then so you can grab the fresh ones as soon as they go up.
Most devices handle PNG coloring well. On iPhone, people often use Procreate, Goodnotes, or Adobe Fresco. On Android, apps like Ibis Paint X, Sketchbook and Medibang work smoothly. It really depends on what feels comfortable for you and how simple or detailed you like your coloring to be.